Tuesday, February 21, 2012

Fluffy Pineapple Upside-Down Cake.

This was the Valentine's Day dessert I made for Kurt. He gets random pineapple upside-down cake cravings and then pesters me about it for months until I make him one. This time he started wanting cake several weeks before Valentine's Day so I just put it off until then so I could combine request fulfillment and obligatory Valentine's Day sugar into one neat little package.

Preheat the oven to 350 degrees. Put some butter in a 9-inch pan (square and round are both fine) and put it in the oven to melt.
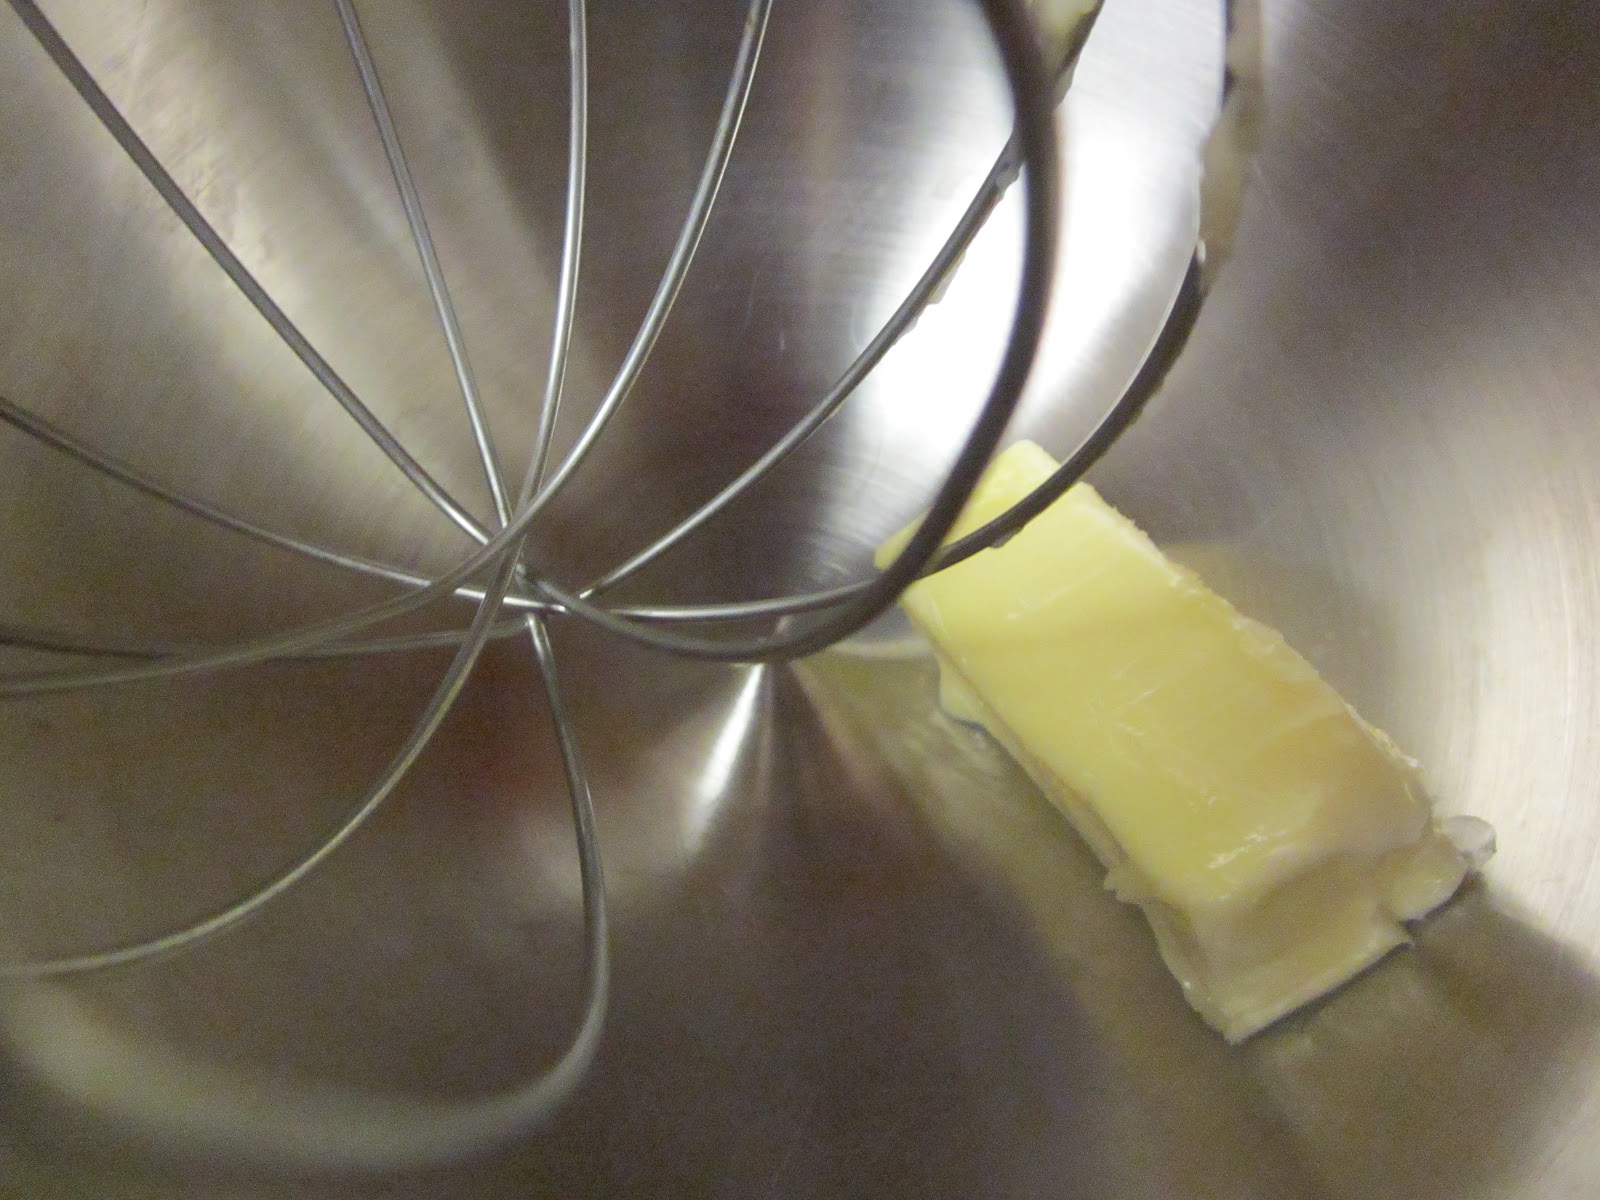
 Meanwhile. Add really really soft butter or shortening to your bowl. Since you're going to basically be whipping the batter instead of stirring it, it's just much easier if it's entirely softened. (BTW, I used my kitchenaid mixer with the wire whip for this but a hand mixer would also work just fine. Just DON'T think it will turn out as well if you just stir the ingredients up. It needs to be fluffy.)

 Add flour, sugar, baking powder, and salt. Also milk and egg which are not pictured but I trust you to figure it out. Mix it up on low speed for 30 seconds or so - enough to get it all stirred together so flour isn't flying everywhere.

 Meanwhile, take the now-melted butter out of the oven, make sure it's spread evenly around the dish, and add a layer of brown sugar. The recipe said 2/3 cup, but I don't measure. As long as it's a nice thick layer. (Warning: butter and brown sugar are so delicious together you will want to eat this as is. Resist.)

 Ok everything's pretty much stirred together now. Turn your mixer up to high.

 Let it run for several minutes until the batter is really fluffy.

 Now arrange your pineapple rings in an adorable flower. Or a boring square if you're using a square pan. A can of pineapple rings has exactly nine rings I believe so it's just enough to fill up a square pan. So convenient.

 Maraschino cherries! Some people like to just put one in the middle of each pineapple ring which I will admit is probably cuter and more orderly but you don't get as many cherries that way so my way is better.

 The batter should be looking nice and fluffy by now.

 Spread it over the top of your pineapple and bake. It goes for almost an hour so it's good to get it in the oven and then make the rest of dinner.

 When it comes out, let it sit in the pan for a couple minutes. If you don't, all the sugar and butter in the bottom (top?) will be completely liquid so it will get everywhere instead of staying on the cake where it belongs. I flipped one of these over too soon once and it was a truly sad day for me. But also don't let it sit for too long or it will stick to the pan and be gross. 

Flip it over onto a plate, NOT a cooling rack. That way you don't lose any sugar and butter. Very important.

This is so good, you guys. And I don't even usually like cake.

I used this recipe from Betty Crocker. (I used butter instead of shortening because I don't keep shortening in the house but other than that I didn't make changes.

Saturday, February 18, 2012

Tropical Green Curry with Pork

I made curry for Valentine's Day this year.

(No person in their right mind would want to go to a romantic restaurant on Valentine's Day. Everyone else will be there, probably crying about how their boyfriend didn't buy them diamonds like all the other boyfriends or something. Ew. Besides it was a weeknight and somebody in this household (it's me) insists on going to bed at ten on weeknights. So no going out for us.)

I know a lot of people are against strong-smelling food on Valentine's Day. To these people I say, fine, go eat your depressing gruel in your own little corner. Strong-smelling food such as curry and garlicky things is absolutely the most delicious. Plus toothbrushes and breath mints exist so just use those.

Anyway the recipe.

 Let's start with a delicious-looking pork chop. Why don't I cook with pork more often?

 The fat is really easy to cut off so I did. I am all for fat, don't get me wrong, but this recipe is going to have tons of healthy fat added later on in the form of coconut milk, so I figured that was enough. (Also it's easier to cut the meat once the fat is off, and I'm lazy.

 Cut it into little strips. These were as thin as I could get but that's because I suck and never sharpen my knives. In real curry the meat is thinner. So if you can get it thinner, do.

 For my veggies, I added a red bell pepper,

 and an eggplant. (ignore the fact that it's kind of gross-looking eggplant, none of the eggplants at kroger that day were especially stellar)

 Chop up some garlic and fresh ginger and throw it in to cook. You could probably cheat with the powdered kind but it wouldn't turn out as well at all.

 OK, this is totally optional, but I was making a pineapple upside down cake at the same time as I was making this curry, so I threw in the juice and leftover pineapple. Pineapple juice adds such a great flavor to pork. Then I just cooked it until most of the liquid was either absorbed by the vegetables or evaporated.

 Ok this is starting to look nice and cooked. Won't give us food poisoning, and all that good stuff.

 Add two cans of coconut milk. (You could do a smaller batch and add just one. I guess. But really, add two. This makes dinner for two *and* lunch for the next day, so it's not like you're eating it all right now.)

 Now. A jar of curry paste. Yes, the whole jar. (Really, one jar per can of coconut milk you're using would probably be good. But it's expensive so I just used one jar. And it turned out delicious but really mild. So don't expect spicy.)

 See how the curry paste didn't turn it that green? It's definitely not as strongly-flavored as restaurant curry.

 It would probably be fine without adding anything, but in an attempt to make it greener I added some cilantro. I bought this tube of cilantro blend stuff because it lasts longer than fresh cilantro, but it turned out to not be nearly as flavorful, so I'm just going to have to deal with buying cilantro all the time and never using it all up before it gets gross.

 I also added a mango at this point. Mango is so so so delicious in curry. I couldn't put it in before because it would have gotten really mushy. But if you do add a mango, let the curry simmer for a little while so it gets soft.

I served this with brown rice and a margarita. (I was going for a tropical dinner theme - we had pineapple upside-down cake for dessert because it's Kurt's favorite and so obviously I had to make a dinner involving all the other tropical fruit. Themes are my favorite thing.)

So here's an ingredients list in case you want to make this:
-a couple pork chops
-a red bell pepper
-an eggplant
-a mango
-fresh garlic
-fresh ginger
-cilantro
-two cans of coconut milk
-jar (or two) of curry paste
-pineapple juice if you want to make it like I did
-brown rice

(This is a really expensive dinner to cook... you basically have to spend just as much as you'd spend ordering it at a restaurant. But it was a special occasion and I wanted to try making curry again because I haven't in a while.)

Tuesday, February 14, 2012

Recipes I failed to take pictures of.

The other day we had some friends over and I didn't take pictures as I was making dinner because I didn't want to seem like a dork. So now I'm doing a food blog post without pictures. Which will make me seem like a dork. You really can't win.

Anyway.

For our side dish, I made roasted root vegetables, which is an Alexander family Christmas dinner recipe. It is totally delicious. Here is an actual recipe.


Ingredients:

  • Turnips. 
  • Parsnips. 
  • Carrots. 
  • Beets. 
  • Sweet potatoes.
  • Brussels Sprouts. 
  • Olive oil.
  • Balsamic vinegar.
  • Salt and pepper.
  • Feta cheese.


Directions:

  • Wash and cut up the turnips, parsnips, carrots, beets, and sweet potatoes. 
    • We only used half a turnip because ours was really big and we didn't want the turnip flavor to overwhelm everything else. 
    • You don't have to use both parsnips and carrots. They kind of smell the same anyway. The parsnips have a pretty mild flavor in case you aren't familiar with them.
    • I left out the beets because they have a much stronger flavor and I didn't want to buy an entire bunch of beets just to use one. But they can be good. And of course they add lovely color.
    • Make sure to cut the sweet potatoes in bigger chunks than the rest, because they cook faster and you don't want them to be mush.
  • OK. Now cook whichever veggies you've chosen for a while in a skillet with a bit of olive oil. This will give the outside a bit of extra texture kiiiiind of but not really like the outside of a french fry.
  • Meanwhile. Wash the brussels sprouts and peel off the entire outside layer of them. I know it seems wasteful but the outside layer is gross so just get rid of it. Then cut them in half. 
  • Put your semi-cooked vegetables and the brussels sprouts on a cookie sheet, add more olive oil, a bit of balsamic vinegar, and salt and pepper. Roast at 400 degrees until they look done. I really have no idea how long this is (25 minutes?) so test with a fork.
  • Serve with feta cheese on top and more oil/vinegar/salt/pepper if it needs any. 


The main dish we ate with the vegetables was based on this recipe. I floured/salted/peppered two pounds of chicken tenderloins and cooked them in a skillet with some butter and olive oil. And in another pan I cooked two packages of mushrooms and several cloves of garlic, also in butter and olive oil. (Healthy was not the theme that day.) Then I chopped up a bunch of green onions and threw them in. And then added a bunch of white wine and let it cook for a while. Then I had to add a bit of flour because it wasn't thickening up. Then it thickened up too much and I had to add more wine. (More wine... oh no!) I didn't serve it with rice but I did have garlic bread available so you know. Starches. We had them.

Saturday, February 4, 2012

In which I decide to be healthy.

I decided I would be momentarily vegetarian in order to lose weight.

It didn't work but it tasted good anyway.

Since I don't know how to cook fancy vegetarian food I just cooked a bunch of veggies at the same time.

 Wok.
(And some olive oil or butter. Veggies fried in butter are so delicious but I used olive oil in some misguided health attempt.)

 Onions. 
(After well over a year of marriage I am still reconciling myself to cutting up onions because Kurt likes them.)


 Green bell peppers.
(And a few seeds, apparently.)

 Red bell peppers.
(Why are these so expensive? Does anyone know where to get them for cheap?)

 Mushrooms.
(I used the pre-cut-up kind from Kroger because they were cheaper than the whole ones that day.)

 Salt and black pepper and crushed red pepper.  
(Crushed red pepper makes everything better lately.)

 Then just let it cook for a little while. I had to add a little water and a little more olive oil. (I like to use water to help saute things. Or apple juice. Or lemon juice. Just so I don't have to use as much oil.)

Grape tomatoes.
(I have recently discovered the deliciousness of grape tomatoes cooked. Plus they were a dollar for a package of them at Kroger. That never happens. I ate them like grapes for a week.)

Black beans.
(These are not delicious. But they add protein. And Kurt will not eat a proteinless vegetarian meal.) 

I thought the vegetables were really good by themselves but the next day I put them in an omelette with cheese (and toasted pita bread because somebody had to eat it.) I use "omelette" in the loosest sense of the word here as it really had zero structural integrity and was mostly vegetables with egg on them rather than egg with vegetables in it. But Kurt liked it better than just the veggies.

Sunday, January 29, 2012

Wilted Greens and Pasta.

This is the kind of dinner that happens when you realize that you bought both a gigantic package of baby spinach and a gigantic package of baby spring mix because they were on manager's special at Kroger. And that this might have been kind of a dumb idea because manager's special means it will go bad in two days. And you most certainly cannot eat that much salad. And green smoothies will only go so far to alleviate the problem.

If you make wilted greens you can use up an almost unlimited amount of salad instantly because they reduce to practically nothing. And then you get to be excited because you're eating concentrated vitamins and iron and whatever else is good about lettuce.

So. Boil some water and cook about a fourth of a package of pasta. Pretend it's not bad for you because you aren't using an entire package.

Then chop up some cloves of garlic and saute them in olive oil or butter.

Then add whatever greens you are using. I used baby spring mix but I imagine spinach or kale would work. (You might need to add a little more olive oil or butter. This is ok because we're pretending this meal is basically salad. So it cancels out.)

You should do this in a deeper pan, not a skillet, so that you can add a lot of lettuce at once. If you have to add it a little bit at a time, some of it will get too done and be gross.

Stir the greens around while they cook and add some salt and pepper. I also added a little lemon juice.

I mixed it with my pasta and put some parmesan cheese on top and even Kurt said it was good. Which made me happy because last time I tried wilted greens he thought they were gross. So my skills are improving, yay!


Here are some other ideas for using up extra greens. 
I will probably try making them all because they sound like nice easy dinners.

Saturday, January 28, 2012

In which I take hanging items and hang them on something else.

A demonstration of my incredible organizing prowess:

I am pretty sure a whiteboard for the kitchen was the first thing Kurt bought for the apartment. Here it is.
 

The whiteboard is actually irrelevant though so don't look at it. Look at these little hooks I put on the wall to hold oven mitts and such. Ignore my list of goals on the whiteboard because even though they might sound achievable I basically never do those things. My grocery shopping consists more of "Ooh, cheese, that looks delicious. What could I make this week with cheese? I think I'll get the ingredients for that."

 My point is that the hooks were uncute and not even on the wall in a straight line so I took them down. If you ever want to use these, btw, either be super super patient taking them off or ignore their claims that they don't damage the walls. Here is what happened to my wall. Boo.

So I hung up this little guy that I bought at a thrift store. You know, just in case the fact that I have copper-colored jello molds hanging on the wall above my stove didn't make me feel enough like I'm in somebody's grandmother's kitchen. Now I have this. Pretty exciting, yes?

You can totally see the nails which I hadn't planned on. Gross. But still cuter than the alternative.

 At this point Kurt decided that the structural integrity of this whole apparatus was severely lacking, so he decided to fix it. Hammering things is a man's job, in his highly unprogressive mind.

 Kurt also made some little fabric loops to help hang some of my things on it. Here it is all accessorized.

 I love that we actually use this wall. P.S. The fact that the clock is off-center is the result of Kurt's aforementioned Hammering Is For Men attitude. I did not hang that clock.

Second masterful work of kitchen organizing genius:

Here is a box I stole from Kurt. It used to hold CDs. But now it is a kitchen box. There was nothing he could do.


So I took the mortar and pestle and mini teapot out and now I have a box for all the things I like to have next to the stove when I'm cooking. (Olive oil also goes in here but I am lame and did not get a picture. Which is terrible because I am sure my readers will fail to grasp the concept if I don't include the olive oil.)

So yeah, now my entire kitchen is completely organized except for a lot of the cabinets and the entire pantry and refrigerator. But y'all know that having a salt-pepper-olive-oil-and-vinegar box clearly takes priority over a refrigerator where I can find food before it gets moldy. Right?

Monday, January 23, 2012

baby biscuit pizzas.

One day I noticed that my tube of biscuits in the fridge would expire soon. Which is weird because it had never really occurred to me that tubes of biscuits, which are after all gross processed food, could expire. Oh well. Anyway I also had some cheese that needed used so I decided biscuits might make cute baby pizzas. 

 Step 1: Olive oil in a pan, then chopped garlic, a can of tomato sauce, a can of tomato paste, and a nice dollop of red wine. (Does red wine dollop? I think so.)

 Step 2: Grind up some fennel, basil, oregano, salt and pepper. We have a fancy mortar and pestle but really you can just toss it in. Rub it between your hands or crush the leaves a little to get it to release more flavor. This mortar and pestle set was like $6 at World Market though so get one if you want to feel gourmet without actually knowing anything.

 Step 3: Stir spices in. Become really really excited about future pizza.

 Step 4: Throw in a little bit of sugar. It will bring out the flavor of the tomato sauce. Really it will. This is important. I like using brown sugar but I suppose white would be ok. Also I don't know why the sauce decided to photograph a gross shade of brown right here. It was red, I swear!

Step 5: CHEESE. I had some fresh mozzarella which is amazingly delicious and also you can get it at Costco which means it's really good cheese for the price of normal cheese. Normal cheese would be fine too.

 Step 6: You should have put the biscuits in the oven a few minutes ago, I hope you didn't forget. Take them out now.

 Step 7: Split them in half and spread sauce on each half. Ignore how gross the cookie sheet looks after just having contained biscuits. I could take fancy staged pictures or make dinner in a reasonable amount of time, and I choose the latter.

 Step 8: Add as much pepperoni as will fit, which unfortunately is really only 3 per biscuit.

 Step 9: Try not to put too much cheese on because it will melt everywhere. Fail spectacularly in your cheese reasonability efforts.

 Step 10: Put it under the broiler and try not to freak out at how much your cookie sheet warps. It will go back to normal, it always does.

 Step 11: Remove from oven and yes the cheese *has* melted everywhere. (That's why I couldn't wait for it to get any browner.)

Step 12: Place on a plate so it will look slightly more appetizing. Really, these were quite yummy.